Tuesday, 21 September 2010

Tri Shutter Card - Dads Birthday


Here is my first attempt at a Tri Shutter Card. What a nightmare, cutting out all those panels and then trying to figure out where to put the embellishments so as the card would shut. But I did it and I'm very happy with the result.


The designer paper is by K & Company.
Flourish stamp - Tim Holtz
Butterfly - Marianne Design Creatables Butterflies 3. This was Cut from a lilac Bazzil card and then sponged with Tim Holtz Weathered Wood and Broken China Distress inks and then double heat embossed.
The flowers where made by me using EK Success Daisy punches. Again sponged with Tim Holtz Broken China Distress ink. The stamens I bought. The leaves are made using Nellie's Choice Jumbo leaf punch and embosser.
Metal frame and feather I found in my stash of goodies :o) The postage stamps are from Graphic 45 and the cameo is a Dress it Up button. I cut off the shank removed the cameo ant then sanded and painted the frame (which was black) with Smooch Azure ink. I left this for a couple of hours then wiped off the excess.
Very Best Wishes stamp is by Butterfly Kisses. Stamped with Toffee Versafine. Then the words were painted with Smooch Azure and Molasses. The Azure words were then gone over 3 or 4 times with Sakura Clear glaze gel pen.
Small butterflies are Martha Kay's' Medium Monarch Butterfly punch.
The poem is by Walter De la Mare and is called "The Sleeper", it's actually about Ann watching her mother sleep, but I changed it to father. You might be thinking what has that poem got to do with birthdays. Nothing, it's just that my Dad has a habit of falling asleep in the chair and it seemed appropriate, especially as the "watcher" is named Ann.
The dots around the box sides were made usin my Scor-Pal and Scor-Bug Embosser.
I'll show you how I made the flowers another time, but until then ...
thank you for looking and take care and keep smiling :o)

Thursday, 2 September 2010

How to make a paper rose - Tutorial.

I did promise a while back that I would post a tutorial for paper roses. Now let me just make it clear this is NOT my tutorial, I got this from the Magnolia Ink Issue 3- Fun in the Sun magazine. The tutorial was done by Johanna , unfortunatley the rose tutorial is not on her blog (well I couldn't find it, but then I can't speak Swedish LOL ). So here is my version. The pictures are not very good I'm afraid, and I've done them small to fit them all on, so if you need a closer look please click on them :o)


First picture shows the tools used to make the roses. The punches are called Retro Flower and are by EK Success. You'll also need a mister, something sharp to make a hole and a small brad. I didn't have a mister when I first made one of these roses, I just flicked the water instead. Oh and you'll need some double sided paper/card.


You need to punch out - 4 large, 3medium and 3 small flowers. Then I stacked the large flowers together and made a hole in the middle, then did the same with the medium and small. I found it easier doing it that way than stacking them all up and trying to make sure they were all even.


Then load the flowers onto the brad, space out evenly and then fix brad. Then spray or flick water onto the flowers. Depending on the thickness of the paper/card will determine how much water you'll need to use. DON'T completely soak or the paper/card will tear. I tend to spray and then as I lift the petals if I think it needs it I'll spray again.


This piture shows what I mean by lifting the petals. Do it one layer at a time until it looks like this..


Now at this point I like to give it a good squeeze, but only because I like my petals to have a "veined" look, If you want your petals smoother don't squeeze the layers too much as you are lifting. Then VERY carefully peel back the petals one at a time. I say VERY as they can tear if you are to rough. I used the tool for piercing to help peel, but then I haven't got long nails.
Then you should end up with something like this...


Not very elegant, so at this stage I start to shape the petals. Using something like a cocktail stick gently curl back the petals until you are happy. Then leave to dry. I usually leave overnight to make sure it's completely dry and then it will keep it's shape and should look like this...


Johanna didn't do leaves in her tutorial, so I'll show you how I made mine.


The punch and embossing set is by Nellie's Choice and I used Bazzil card stock.


As you can see I sponged the edges of the punched leaves and drew a line down the middle of the leaves with red ink. Then it's time to emboss them...


Now I'm only a small person with little hands, and I found it hard to make a good impression, so I put it on the floor and trod on it with my heel :o) And here's a photo of before and after...


And here are the finished roses that I sprayed with some Glimmer mist.


There, hope I haven't bored you too much. They really are very simple and again I would like to thank Johanna for sharing her lovely roses.
Take care & keep smiling.

Wednesday, 25 August 2010

Art Deco Birthday card - for a man

Well now for something completely different, instead of vintage, Art Deco. I did the card in this style as I was asked to make this card for a friends' boyfriend, and I'm not very good at making cards for men unless I really know them. Anyway here's my attempt...


The main design in the middle was made by me, here is the template if you wish to use it 
I printed out three times and cut them out like this...


The embossed lines on the silver silk mirri card were made using my Scor-pal. The rhinestone 30 I bought and the only embellishments used were some rhinestone brads and peel offs.
Inside the card the diamond embossing was done using the smallest square Nestabilitie and again the lines were made using the Scor-pal. The poem I found on the web. I'm not sure I like it, but I think that maybe because I didn't distress anything :oD Anyway I hope she likes it. Thank you for looking, oh here's another Art Deco template I made


Take care and keep smiling.

Sunday, 1 August 2010

Vintage Golden Wedding Anniversary card and a handmade rose !!!


I was asked to make a Golden Wedding Anniversary card, and in this day and age of "disposable" marriages to have a couple reach such a mile stone is cause for celebration indeed :o)


The backing paper/card was made by me using Hessian embossed card, Tim Holtz Distress inks - Antique Linen, Scattered Straw, Frayed Burlap, Spiced Marmalade and Tattered Rose. And then stamped with Inkadinkado Gem Flourish clear stamps using Versafine "Toffee" inkpad. Then sprayed with Glimmer mist Gold.
The roses I bought from a gorgeous new website Wild Orchid Crafts. They too were sprayed with the Glimmermist. The heart is made from 3mm Beech wood that I bought from Button-it when I went to a craft fair at the begining of the year. I haven't been able to fine these hearts on their website but I've no doubt if you emailed them they would be able to help. The heart was sponged with StazOn Metallic Gold and Copper ink and StazOn Timberbrown. The sentiment on the front is computer generated and embossed down the side with a Cuttlebug border embossing folder, and then inked with the same colour combination as the backing paper/card.
The heart in the insert was made using Nestabilities heart die and Cuttle bug embossing folder then hand stitched with gold thread. It was all then sponged with Brilliance inkpads Gold, Beige and Coral. The flourish was made with Sizzix Bigz die "Decorative accent with flower".
My "logo" on the back is hand stamped the other information (sentiments) is computer. generated.
Finally the box was decorated using Nestabilities square die and the embossed using a Cuttlebug Embossing folder and edged with gold peel offs.
I was going to make my own roses, but that would have taken to much time. But here's a picture of one I made a while back


This rose I made following a tutorial given in the Magnolia Ink Magazine edition No.3 2010. And it is VERY simple to make. The lady who gave the tutorial has a Blog but unfortunatley didn't put the tutuorial for this flower on there :o( When I've got time I'll post a tutorial for this rose, but of course ALL recognition will go to the lady who did it first. So until then ...
Take care & keep smiling :o)

Sunday, 20 June 2010

Vintage Fathers Day Card


Hello and welcome to my new card. It's Fathers Day so what better card to show you than the one I made for my Dad...


All papers used were made by me on the computer and printed on hessian embossed card..
The picture used on the front was sourced from the internet and is called La Scapigliata by Leonardo Da Vinci. Her hair is "highlighted" with very small gold stitches ( I apologise for my stitching. Sewing is not one of my strong points)
"DAD" was first stamped using Anna Griffin "Elegant Engraving Alphabet" clear stamps and again hand stitched and rhinestones added.
The hinge, lock and key were made using Tim Holtz Alterations Hardware Findings die, thick grey cardboard that was inked with Tim Holtz Distress inks - Frayed Burlap, Vintage photo and Firebrick red. Then they were inked with VersaMark ink and heat embossed with Tim Holtz Distress embossing powder Black soot. I used the die in my Cuttlebug using the sandwich - B plate, die (cutting side up), card then B plate again. I ran it through twice to make sure it went through the card.
The flourishes on the inside were made with Tim Holtz Alterations Elegant Flourishes die and hand stitched on.
The passage was printed on Jacquard Inkjet Silk, and the word love was again hand stitched. The font used is FranciscoLucas llana, a free font from abstract fonts.
And here's the present I gave to my Dad


Thank you for looking and Take care & keep smiling

Sunday, 6 June 2010

Happy Tilda 18th birthday card, gift set


Tilda strikes again :o) This time for an 18th birthday. I was asked to make this card for a girl who is girly but loves football AND she absolutley adores the husband of Belinda (lady who requested the card). The snag to this is the birthday girl and the husband both support different teams, who happen to be bitter rivals in the world of football. So how to combine all those facts into a card... well here's what I did (lots of photo's, click on them to see more detail) ...
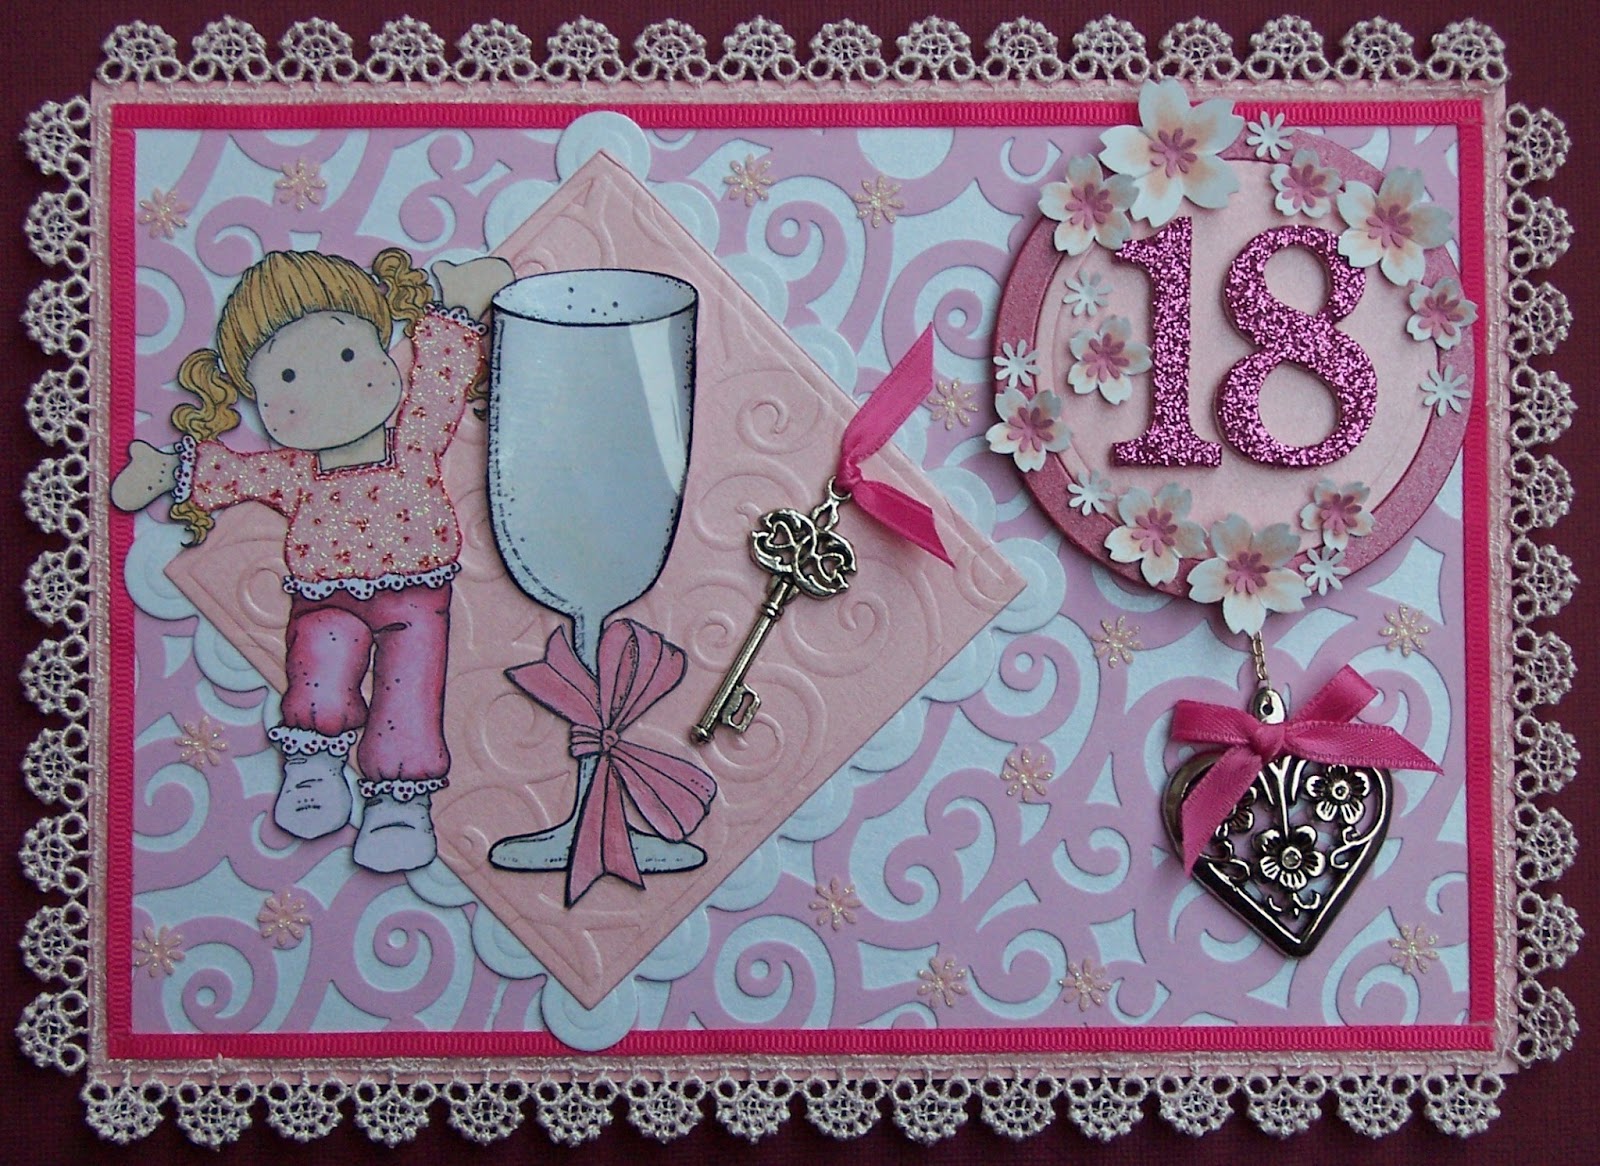
Bazzill card stock - Flowers, covering picture frame and picture mount.
Stardream pearlescent card - base card, square, star and circle Nestabilities,.
Creative Imaginations Samantha Walker Die Cut swirl card
Glitter paper - flowers, Tilda's top.
Shimmerz paint - "Angel Wings" on champagne flute, "Poinsettia Pink" on footballs.
Smooch paint - champagne flute ribbon.
Atyou glitter pens - Football badges and sentiment.
Tim Holtz - flowers
Rubber Stamps - Happy Tilda and Champagne flute by Magnolia Rubber Stamps - coloured with Derwents Coloursoft pencils and Sansodor.
Printable acetate.
Bling on a budget rhinestones.
K&Co paper lace - inside card.
Numbers 1 and 8 - bought from Hallmark Cards.
Pink cotton lace and ribbons.
Metal key and heart bought from eBay.
Cherry Blossom multi punch by Woodware.
I'm not going to go into great detail as to how the card was made, but the insert backing paper was made by me using a football image sourced from the web and then changed to pink. I then painted over the pink parts with Shimmerz paint. The football badges were sourced from the web changed the colours to various pinks and then coloured over with Atyou glitter pens.
Tilda's top was my first try at paper piecing, I used Stazon Rocket red ink on pink glitter paper and then went over it with a Staedtler fine red pen.
Thank you for looking and take care and keep smiling