Showing posts with label Dress It Up. Show all posts

Sunday, 3 March 2019

New Baby Girl Exploding Box

It's seems to be all babies lately, this time a baby girl is imminent for my daughter-in-laws sister and as I really enjoyed making the baby boy box I decided to do another...

Materials used -
Stamperia - Baby girl 12x12 paper pad 
Die-namics stitched scalloped dies -  rectangles, squares and circles
Die-namics stitched scalloped frame dies - circles and squares
Fiskars - Sunburst border punch
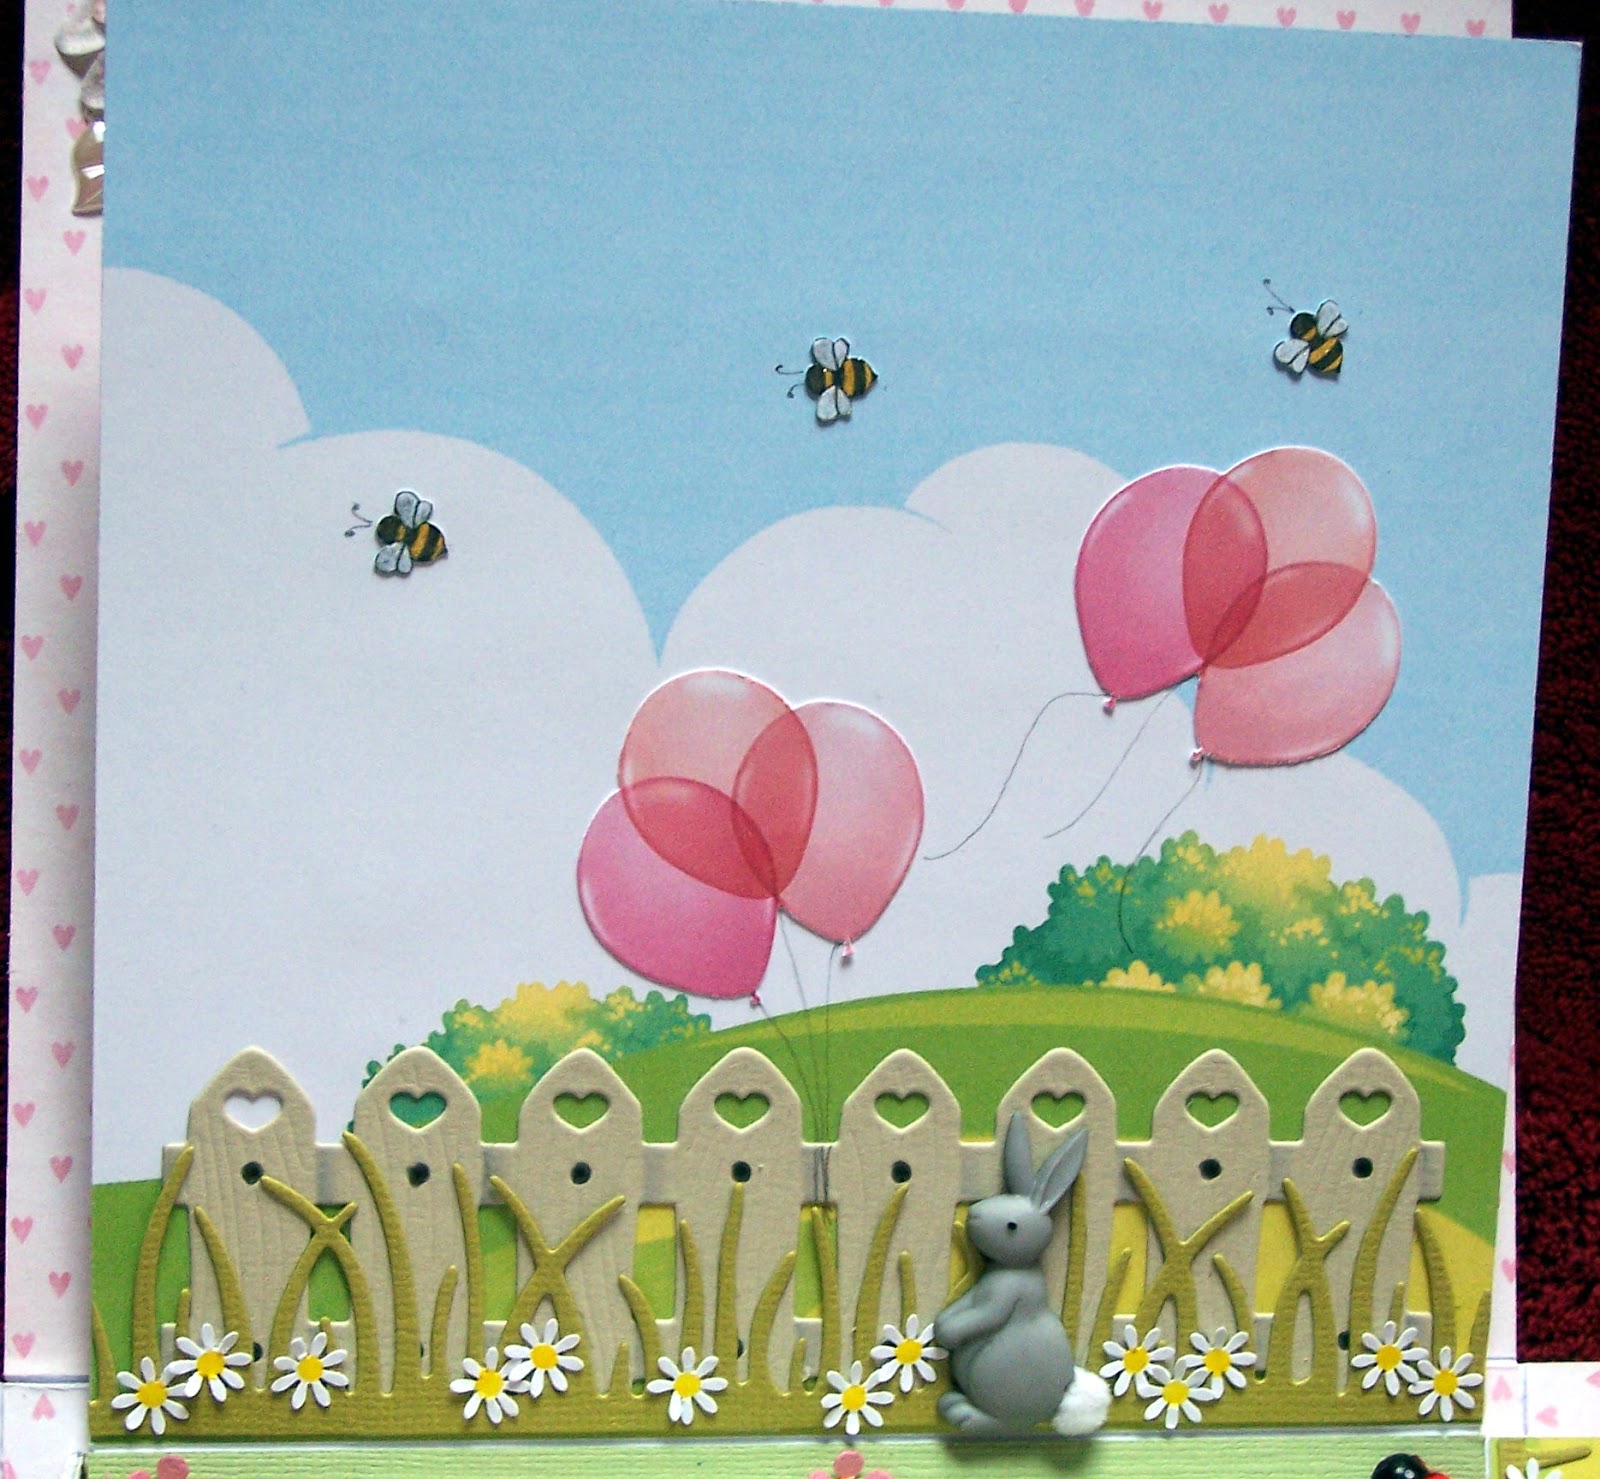
La La Land - heart fence die
Martha Stewart -  Grass border punch
Memory box -  Contempo bird dies
Poppy Stamp dies - Grand Madison door, small Madison window, small flowerbox (also upside down for door step)
Nellies Choice - stamen punch
Flatback pearl leaves from Wild Orchid crafts
XCut - butterfly palm punch
unknown make tiny flower punches
Buttons Gallore & More Buttons - Baby girl
Dress it up buttons -
Jumpin Around (rabbits)
New Arrival Girl
Stuffed with Love (Teddies)
Garden Gnomes
Out Foxed
Forest Babies (hedgehog)
Dog gone
Nine Lives
Gardening
nature backing paper, bees, ballons, letterbox, house number plaque and curtains - computer made
Brick wall - Magnolia rubber stamps
Baby, teddy, rabbit, door handle and door knocker - dolls house miniatures
Pram - own design. Please don't ask for template it was done purely using a spellbinders circle die for the body of the pram at the size I wanted then I winged it from there hahahaha
The bag however I did make a template for -

The overall printed size for the one I made is 7.5cm high and 8cm wide

Thank you for dropping by. Take care & keep smiling :)

Monday, 12 November 2018

New Baby Card

My son asked me to make a baby card for a friend he went to school with, baby isn't due until the new year but I do like to be ahead of the game ...

Polka dot card made with Sizzix A4 polka dot embossing folder
Spellbinders Nestabilities - Elegant Ovals dies
Dress it up buttons
Front picture and box pictures sourced from the web

Take care and keep smiling :)


Friday, 15 December 2017

Minion Nightmare before Christmas Card

For my friend Lyn who is a Nightmare before Christmas fanatic like me !!!
 All pictures and backing paper sourced from the web and adjusted/altered on my computer to get the picture I wanted, so I take no credit for the artwork. Most of the pictures used can be found on my Pinterest.
 Take care and keep smiling :)

Thursday, 30 November 2017

Rupert Bear Christmas Card for my Dad

Rupert Bear again :)
 All pictures sourced from the web and can be found on my pinterest boards and embellished with dress it up buttons and wink of stellar glitter brush pens. And in case you didn't guess the "poem" is my effort again.
Take care & keep smiling :)


Wednesday, 29 November 2017

Monster Christmas card

Not quite Krampus, but monsters all the same for my son and daughter-in-law!!!
 The "monsters" are artwork by Chris Ryniak. Apart from the sky on the front of the card and the spotty paper all the rest were coloured with Derwent coloursoft pencils, Zig Wink of stellar glitter brush pens and Sakura gellyroll clear glaze pens. The eyes were first gone over with the clear glaze pen twice and then Sakura 3D crystal laquer (go over with the clear glaze pen first otherwise the colours will bleed). Dress it ip buttons and the hat and scarf are dolls house miniatures. the frame was made with faux fur. Oh and the sentiment is my attempt at poetry, hahahahahaha
Take care and keep smiling :)

Tuesday, 14 November 2017

Harry Potter Exploding Box

I'm not a fan of Harry Potter (I think I saw the first three films) but my friend Val is, and as it's her 60th birthday I made the effort and did a Harry Potter exploding box...
 Harry Potter scrapbook paper used on the outside and inside of the first box. The brick paper on the top of the first box is dolls house paper (used to cover the outside of a dolls house)
The stone walls and lid of the inside box was made on the computer as was the stone floor (I love my new printer, I can put 350gsm card through it no problem). The swords are dolls house miniatures, the sorting hat and Fawkes and the ribbon (the phoenix) were bought off etsy and ebay. The 9 3/4 on top of the box was a badge and the owl on the side of the inside box is a dress it up button. The newspapers, wanted posters and all other paper embellishments were made by me.
The 60 and fantastic beast creature were coloured with Zig Wink of Stella clear glitter brush and Sakura 3D crystal lacquer. The Fantastic Beasts font is available here.

Take care & keep smiling :)

Wednesday, 25 October 2017

Hocus Pocus Birthday Card

My new Daughter-in-Law Phoebe luuuuurves the film Hocus Pocus...
None of the artwork is mine and I take no credit for them, they were all sourced from the internet. The broom is a dolls house miniature, as is the book (it opens and has spells in it !!!) the cat on the broom is a Dress it UP button and black glitter velvet ribbon is around the box.
Take care and keep smiling :)

Tuesday, 21 September 2010

Tri Shutter Card - Dads Birthday


Here is my first attempt at a Tri Shutter Card. What a nightmare, cutting out all those panels and then trying to figure out where to put the embellishments so as the card would shut. But I did it and I'm very happy with the result.


The designer paper is by K & Company.
Flourish stamp - Tim Holtz
Butterfly - Marianne Design Creatables Butterflies 3. This was Cut from a lilac Bazzil card and then sponged with Tim Holtz Weathered Wood and Broken China Distress inks and then double heat embossed.
The flowers where made by me using EK Success Daisy punches. Again sponged with Tim Holtz Broken China Distress ink. The stamens I bought. The leaves are made using Nellie's Choice Jumbo leaf punch and embosser.
Metal frame and feather I found in my stash of goodies :o) The postage stamps are from Graphic 45 and the cameo is a Dress it Up button. I cut off the shank removed the cameo ant then sanded and painted the frame (which was black) with Smooch Azure ink. I left this for a couple of hours then wiped off the excess.
Very Best Wishes stamp is by Butterfly Kisses. Stamped with Toffee Versafine. Then the words were painted with Smooch Azure and Molasses. The Azure words were then gone over 3 or 4 times with Sakura Clear glaze gel pen.
Small butterflies are Martha Kay's' Medium Monarch Butterfly punch.
The poem is by Walter De la Mare and is called "The Sleeper", it's actually about Ann watching her mother sleep, but I changed it to father. You might be thinking what has that poem got to do with birthdays. Nothing, it's just that my Dad has a habit of falling asleep in the chair and it seemed appropriate, especially as the "watcher" is named Ann.
The dots around the box sides were made usin my Scor-Pal and Scor-Bug Embosser.
I'll show you how I made the flowers another time, but until then ...
thank you for looking and take care and keep smiling :o)