Showing posts with label Cuttlebug. Show all posts

Sunday, 3 August 2014

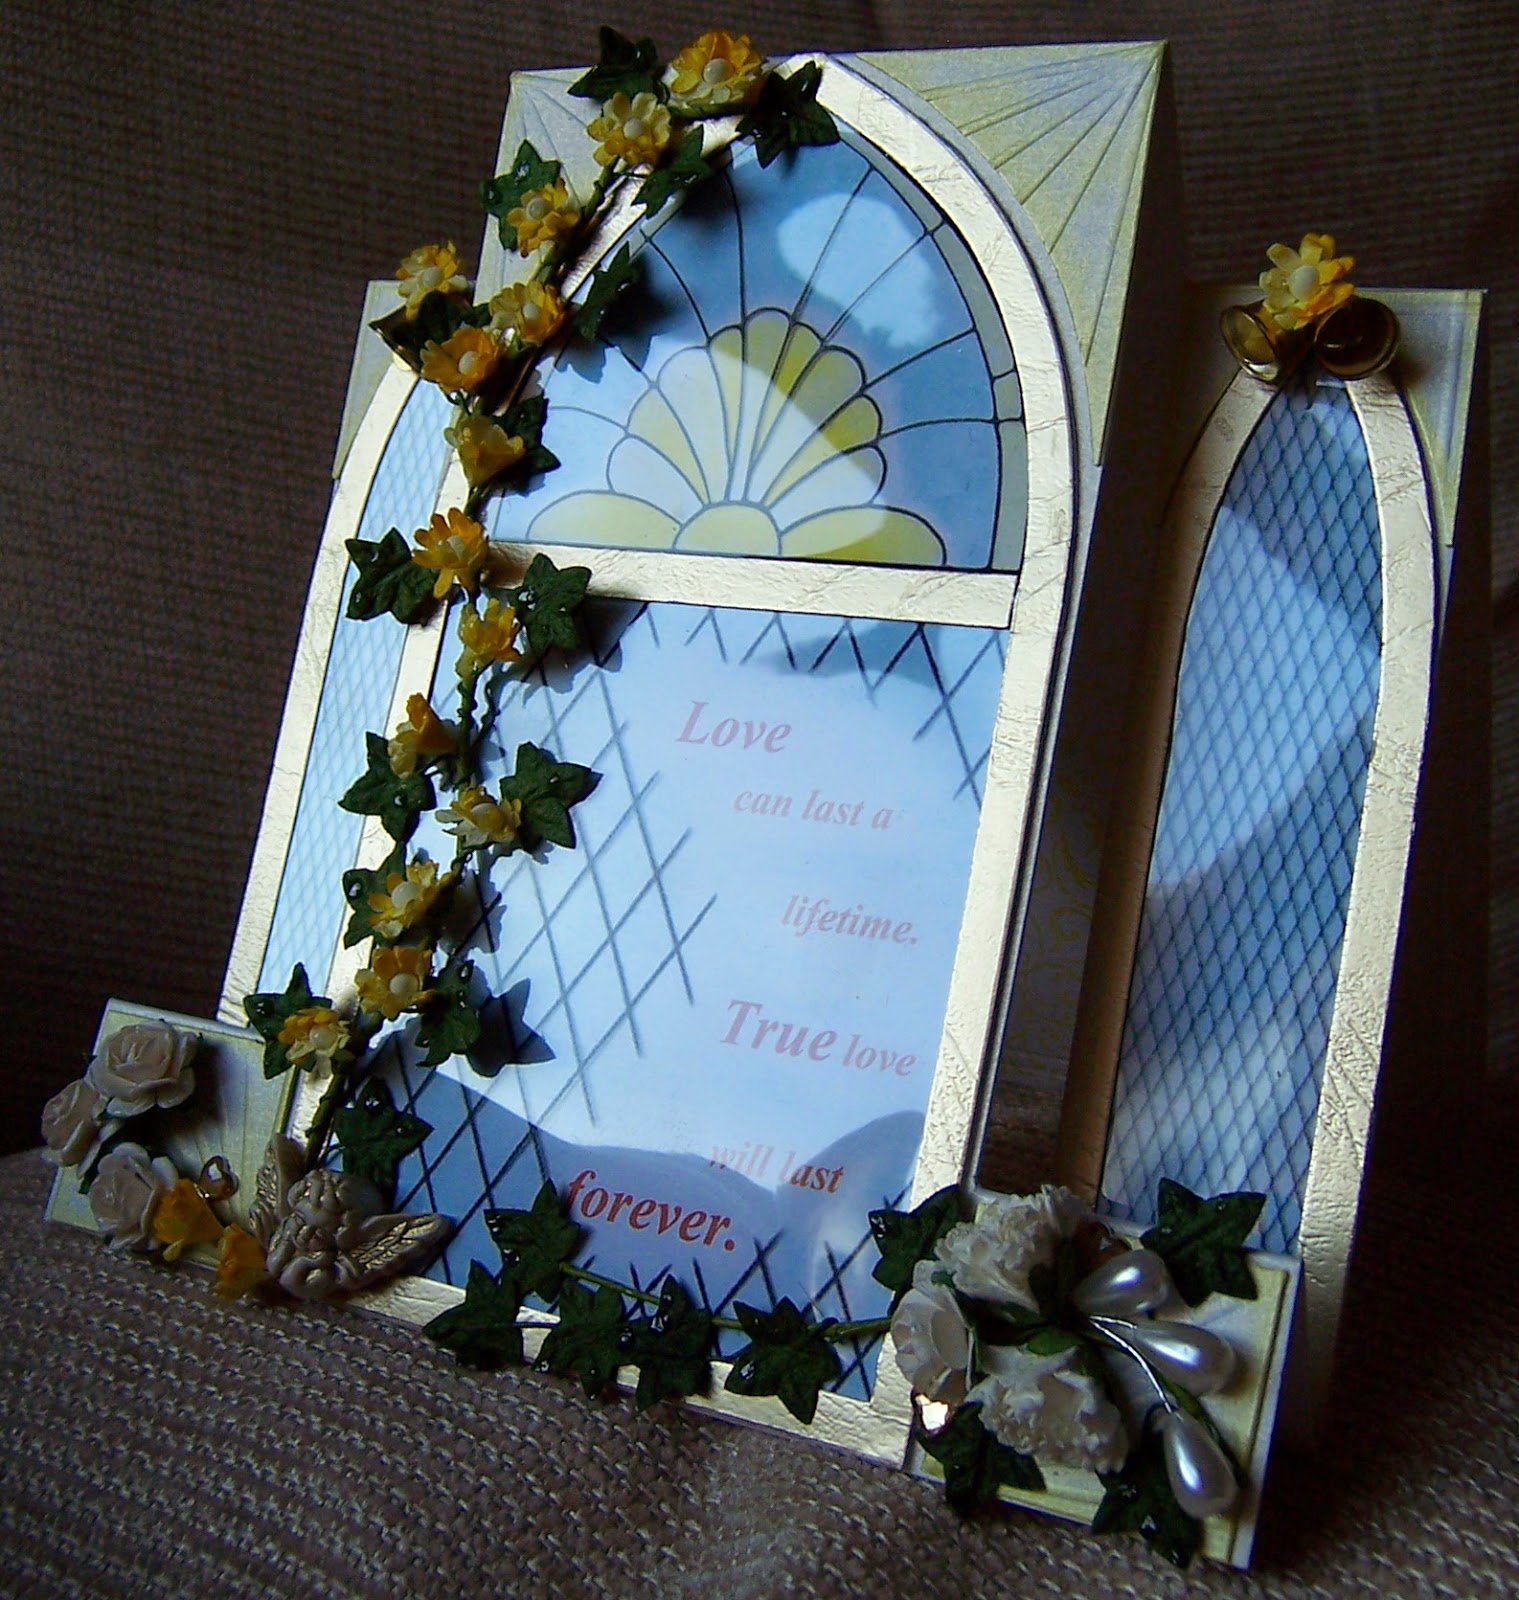
Wedding Card - Centre Side Step

Another Wedding card !!! Another commission, (that I'd said I wasn't doing any more !!!) Well it is now as I've got lots of my own projects I want to do, and I'm determined to do them :o) At the bottom I've added the templates I made to make this card ...


Arched windows - hand cut. The leaded and stained glass effect is computer generated and printed on to printable acetate, all mounted onto card that had been coloured with Derwents colour soft pencils.
The back envelope has the Heartfelt Creations "Timeless Amour" die cut. The envelope insert sentiment is computer generated and gone over with Atyou glitter pen and clear glaze pen and the top of the card embossed with a Cuttlebug border embossing folder.
The box panel was embossed with a lattice design (can't remember the manufacturer, and it's not a folder, just a plastic lattice sheet.) All other embossed lines were done with a ScorPal.
Here are the templates I made ( This is a 16cm square card and is in two parts. I haven't put the second part on as it's just a square. When you have done all the folds, glue or use double sided tape on to the top fold to attach the back panel) ...
 I'm not sure if these will print out the size that they are, but feel free to use them if you wish.
Take care and keep smiling,

Tuesday, 17 June 2014

Father's Day Card - Steam Punk Exploding Box

I knew I wanted to attempt another Steam Punk card and thought it would be great for Father's Day, but as usual I wanted something a bit different, and thought I'd have a go at an exploding box, as I'd never made one before. Loved making it, so much so I will definitely be making one again....
Satin Mirri card - pewter and copper
Embossing Folders - Cuttlebug- Diamond Plate and Clockworks.
Wooden Airplane and cogs are from Cog 'O' Two
Silhouette was hand cut from a picture sourced from the internet.
Papers are from - Prima Marketing Craftsman Collection "Mechanic" and Basic Grey Sugar Rush Collection. (The basic Grey paper was stamped by me)
And instead of a poem or such as a sentiment, I used the memories I have of my Dad when I was a child.
Take care and keep smiling

Saturday, 24 September 2011

Steamer Trunk Gift Box

Finally got my crafting head on and came up with this, a steamer trunk gift box. My Dad went to Germany for a holiday, and bought back a small Stein jug to give to our friend Gillian, but it didn't have a box so my Dad asked if I'd make one. And to keep in the holiday/travelling spirit thought this was appropriate...


The "leather" work was made with Tim Holtz' Grunge paper and stained with his Vintage Photo ink pad and then hand stitched. The corners were cut from Nestabilities circle dies. The travel stickers were from Cavellini & Co. And the interior was fully lined with velvet paper. Oh and the box was made with mounting board, which was just under 2mm thick. Thank you for visiting and taking a peek.
Take care and keep smiling :o)


Thursday, 10 March 2011

James Bond 007 Birthday card for my brother

As you may have seen from previous posts, my brother is a big film fan/buff, so the cards I make him tend to reflect that. On this occasion I chose to do something different from the horror cards, and went for action instead ...


Did you notice underneath my logo on the back of the card are the words "Take care & keep smiling Ann" That is a rubber stamp that was made especially for me from my lovely friend Els. When I opened the lovely little box she had made for it and saw the stamp, I'm not ashamed to say I cried. Thank you Els XxXxX
Well as I always say at this point...
Take care & keep smiling :o)

Monday, 14 February 2011

Valentines Day Card - House Mouse

Long time no blog !!! But I have been crafting away like a little busy little bee, and here is one of my efforts. I made this Valentines card for my son to give to his girlfriend. I decided on something a little different from the usual Valentines, taking into account that my son and his girlfriend live about 200 miles apart and don't get to see each other as much as they'd like. But saying that my son will be moving down to London (where his girlfriend lives) in the summer and then I won't see him so much :o( Oh well I can always get on the train and visit them :o) ...


Waaaay to many details on this card to list but I will tell you I used my Grand Caliber machine and HUUUUUGE circle nestabilities. Hope you all have a lovely Valentines day.
Take care & keep smiling :o)

Tuesday, 28 December 2010

Vintage or Medieval Christmas Card for my Dad

I am so, so naughty, I didn't finish this card until Christmas morning. But my dad said it was worth waiting for :o)


Hope you all had a lovely Christmas. Take care & keep smiling :o)

Monday, 6 December 2010

Vintage Christmas Cards for 2010


Here is my Christmas card for 2010. I made several of these for my Dad to send out to family and friends.


Flowers - Flower Fantasy Die Set - Marianne Design Creatables. Stamen - Nellies Choice punch. Foliage - Pine branch - Marianne Design Creatables - Starry Garland Die Set. L Em - Ash Branch Punch. L Em - Evergreen punch.

Merry Christmas Stamp - Penny Black.

Take Care & Keep Smiling :o)

Sunday, 1 August 2010

Vintage Golden Wedding Anniversary card and a handmade rose !!!


I was asked to make a Golden Wedding Anniversary card, and in this day and age of "disposable" marriages to have a couple reach such a mile stone is cause for celebration indeed :o)


The backing paper/card was made by me using Hessian embossed card, Tim Holtz Distress inks - Antique Linen, Scattered Straw, Frayed Burlap, Spiced Marmalade and Tattered Rose. And then stamped with Inkadinkado Gem Flourish clear stamps using Versafine "Toffee" inkpad. Then sprayed with Glimmer mist Gold.
The roses I bought from a gorgeous new website Wild Orchid Crafts. They too were sprayed with the Glimmermist. The heart is made from 3mm Beech wood that I bought from Button-it when I went to a craft fair at the begining of the year. I haven't been able to fine these hearts on their website but I've no doubt if you emailed them they would be able to help. The heart was sponged with StazOn Metallic Gold and Copper ink and StazOn Timberbrown. The sentiment on the front is computer generated and embossed down the side with a Cuttlebug border embossing folder, and then inked with the same colour combination as the backing paper/card.
The heart in the insert was made using Nestabilities heart die and Cuttle bug embossing folder then hand stitched with gold thread. It was all then sponged with Brilliance inkpads Gold, Beige and Coral. The flourish was made with Sizzix Bigz die "Decorative accent with flower".
My "logo" on the back is hand stamped the other information (sentiments) is computer. generated.
Finally the box was decorated using Nestabilities square die and the embossed using a Cuttlebug Embossing folder and edged with gold peel offs.
I was going to make my own roses, but that would have taken to much time. But here's a picture of one I made a while back


This rose I made following a tutorial given in the Magnolia Ink Magazine edition No.3 2010. And it is VERY simple to make. The lady who gave the tutorial has a Blog but unfortunatley didn't put the tutuorial for this flower on there :o( When I've got time I'll post a tutorial for this rose, but of course ALL recognition will go to the lady who did it first. So until then ...
Take care & keep smiling :o)