Tuesday, 5 February 2013

Friendship / Thank you Card

Hello, I was asked to make a friend / thank you card, and here is my effort...


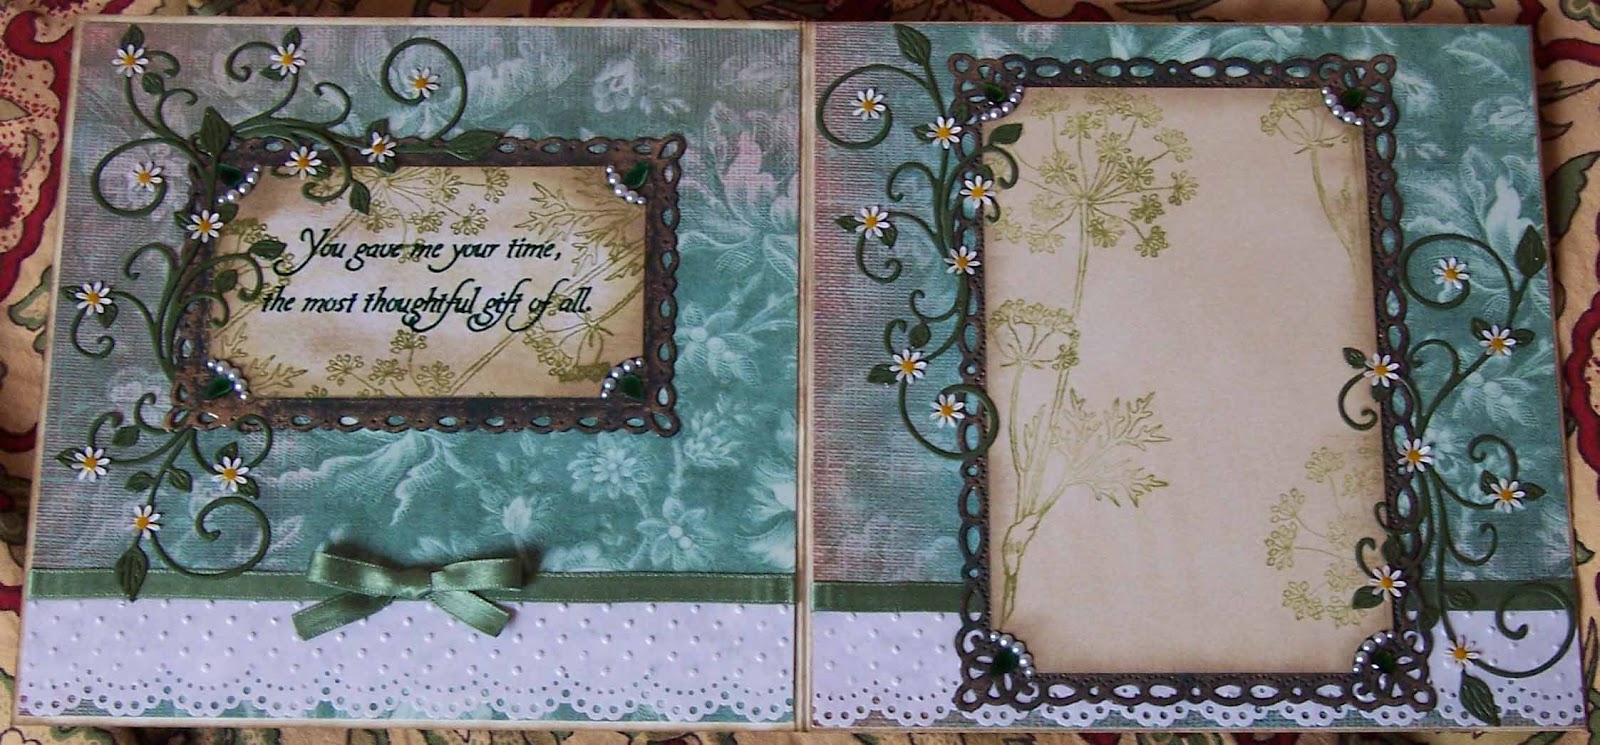
The image on the front is a painting "Sweet Pea Blossoms" by Edward John Poynter. The frame was make with VERY thick grey card gone over with Verafine Olympic Green ink pad and Stayzon metallic copper.
Inside and back the frames are Spellbinders Romantic Rectangles, cut with green card and sponged with Stayzon metallic copper ink.The rubber stamp used on the sentiments and back of card is from Elusive Images "Wild Meadow", (but I think this company has now gone out of business) using Tim Holtz Peeled Paint ink pad. The flourish die is from Cheery Lyn Mini Fanciful Flourish. The flowers don't come with the die, they were made with a tiny punch. The "lace" at the bottom is made with Martha Stewarts Doily Lace punch, and the put the the Cuttlebug with the Swiss dots embossing folder. There, think I covered everything, just got to make a box for it now :o)
Take care and keep smiling

PS. The paper used is Daisy D's Antique Blue - Wild Flowers. Though it's not blue it's green !!!

Tuesday, 1 January 2013

21st Birthday Pirate Ship Card - For my Son

It was my Son Alexander' 21st birthday back in September, but he didn't get to see his card until Christmas Day !!! But as they say "Better late than never" :oD

 I used a template I bought from Sandra's Scrapshop, I modified it a bit, but then that's me, I can't help messing :o)
All of the ship is made with very thick card, and all the "wood" was made with Alota rubber stamps "Fence" 
stamp. coloured in with my trusty Derwent coloursoft pencils and the planks were cut and stuck on staggered. The front and the back of the ship and the crows nest are not included with the template, they are of my own design.
The sails and flags are made from printable cotton, the 21 was hand embroidered and the flags were printed on. If your wondering what the flags mean, (the blue with white spot and red spot) they are the international maritime signs for 2 and 1. The canons were made from brads, the anchors were a pair of earrings, hte wheel was bought from a modeler and the rest were from broken bits of jewellery I found. The Waves were sourced from the internet traced over with a waterproof pen and the coloured with Derwents. I think that about covers it, without getting too boring. Have a great new year and Take care & keep smiling :o)
PS. The inside of the ship was filled with 21 shiny new £1 coins.

Monday, 10 December 2012

Steampunk 21st Birthday Book Card

It's been a long time since my last posting, but I have been crafting, just haven't got around to posting the pictures !!! But here's my latest offering, a 21st birthday book card my friend asked me to make for her daughter. And it's Steampunk, I've only just discovered it, and I love it ...
 The Steampunk girl inside the card is a digi stamp by Kenny K - Lady Victoria, I printed this out in a pale grey colour and went over it with a waterproof pen and then coloured with Derwents Coloursoft pencils, Sasodor and Sakura gel pens. The paper is by Prima - "Engineer" and "Draftsman".The tutorial for the book card was from McMahon, though I did change the sizes as the sizes given were too small as I wanted an A5 size book.
Take care and keep smiling :o)

Sunday, 1 July 2012

Fathers Day Airplane Card !!!

Thought I'd do something different for Fathers Day, and after having seen this airplane in the Magnolia Ink Magazine I couldn't think of anything better. The template is printed in the magazine but I bought the template from the lady who created it, Sandra Strijland. 


I used a thick card about 350gsm and then covered it with paper. To round the body of the plane without creasing it I would suggest using a small rolling pin or something similar. I also suggest only cutting the pieces out when you need them as you may find that some pieces may need adjusting to make them fit, as I did with the window and wing struts. Have in mind how you want to decorate it and decorate each piece as you make it.
The banner wasn't part of the template. The wheels were made with rubber tap washers and press studs.
My Dad now has it on his dressing table :o)

Thank you for looking and take care and keep smiling :o)

Saturday, 19 May 2012

A Fairy Tale Wedding

Here's a wedding card I made last month but couldn't post until the big day was over.


I used a combination of Whiff of Joy, Magnolia and Paper Artsy rubber stamps to create the images, and the papers are from DCWV Once Upon A Time Matt Stack. The size of the card is 6.5 inches by 6.5 inches. Way too many details to go into but if you want to know anything just drop me a line.
Thank you for looking and take care & keep smiling :o)

Monday, 2 April 2012

Butterfly Birthday Card

Hello :o) Here's a birthday card I've made but not quite finished as I'm not sure who I'm going to send it too yet!


The main image is a rubber stamp from Heartfelt Creations called Daisy Patch Background. coloured with Derwents Coloursoft pencils, Sansodor and Sakura Gellyroll Black galze pen. I re stamped the larger flowers (inside the card ond on the front) to mount on top, and punched a black circle and glued on black rhinestones and then stuck in the middle of the flowers. The centers of background flowers are dotted with black galzr pen to give a simular effect. The butterflies on the front were made with Memory Box Vivienne Butterfly die. The whole butterfly is double mounted. You can't see on the photo but the whole butterfly is stuck down at the tip of the tail and a blob of Pinflair silicone glue is under the body to half lift it from the card. I did a simular effect on the half butterfly. The dangly bits on the side of the card I made from silver chain and a variety of beads I've had for years and NEVER got around to using :oD
Inside the card the backgrond to the flowers I made myself using plain white card and Tim Holtz' Antique Linen and Peeled Paint Distress inkpads and the edged were gone over with Versafine Olympic Green inkpad. Versafine Sepia ink pad was used to stamp the butterflies.
The sentiments are computer generated and coloured the same as the sentiments. Oh and I used Martha Stewarts Around the Page Deco Fan punch.
Take care & Keep Smiling :o)

Wednesday, 15 February 2012

Kanreki - Oriental 60th Birthday Card for a man

Did you know that according to the Chinese when you reach your 60th Birthday you enter into your second childhood? It's called Kanreki, so when a friend told me it was her Dads' 60th I decided an Oriental style card using the colour red (very lucky colour according to the Chinese)would be appropriate ...


I used printable accetate for the front window, the stencilled Koi carp (using Dreamweaver black paste and stencil) and for printing the proverb, which reads
At 60 you are reborn. At 70 you are but a child, at 80 you are merely a youth, and at 90 if the ancestors invite you into heaven ask them to wait until you are 100, and then you might consider it.The corner embellishments on the front, inside front and back page sentiment are made with rubber stamped images that are triple heat embossed to give the impression of that lovely laquering the Orientals did on their furniture. The font used is Kudasai. Other embellishments used were black tassels, enamelled beads, large gold brads and a Chinese coin.
Oh and I used faux gold leaf behind the Koi and Proverb.
So until the next project, take care and keep smiling :o)