Showing posts with label alota rubber stamps. Show all posts

Wednesday, 8 August 2018

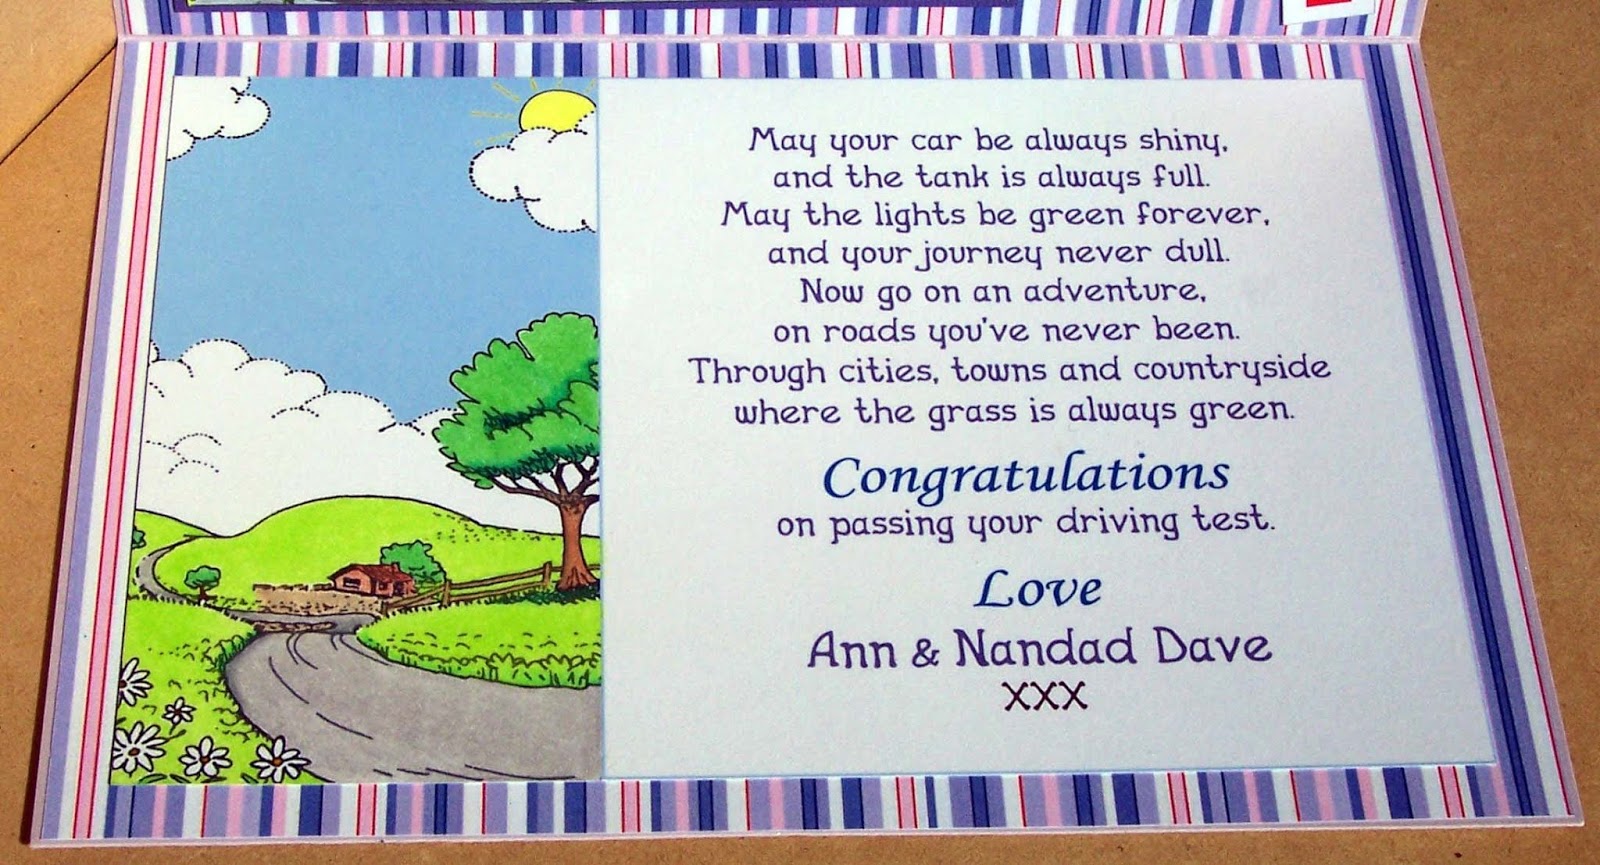
Passed Driving Test Card !!!

My Daughter-in-law Phoebe passed her driving test on Monday, first time !!! Clever girl I knew she could do it. I made the card a couple of months back when they told me she had put in for it (but they didn't tell me when). My son laughed when I said I'd made one, but I told him "I'm prepared when she does pass" ...

 Take care and keep smiling :)


Friday, 30 October 2015

Engagement Card or book - For my son Alex and Phoebe

(name) and (name)
Sitting in a tree,
K-I-S-S-I-N-G.
First comes love,
Then comes marriage,
Then comes baby
in a baby carriage.

This is the poem\song that inspired this card. I did intend just to make a simple open and shut card with my revised poem inside, but I started thinking and it kind of ran away with me. I had just got my Tim Holtz "Crazy Bird" rubber stamps (where I got the opening line for the revised poem) and thought it would be fun to use them for this card...
 If you want any details about stamps, dies, etc please feel free to email me for details.
Thank you for looking, and take care & keep smiling.

Saturday, 8 May 2010

Traveller Tilda Leaving Card


(sigh) I made this card for my lovely team leader Michelle who has moved on to pastures new. I knew I wanted to use the Traveller Tilda stamp but wasn't quite sure what else to do, but once I started I found it VERY hard to stop LOL.


1. DP (designer paper) used through out the card and on the box - Making Memories/Forest Green series. Stardream Pearlescent card. Bazzill cardstock.
2. Punches used - Martha Stewart's Deco Fan border punch and Frond Branch. Nellies' Choice Floral punches and embossers. VERY small daisy punch - unknown make. Corner rounder punch.
3. Stamps used - Magnolia Rubber Stamps - Traveller Tilda, Suitcases and clock. Alota Rubber stamps - Wall/window. Watercolour Stamps - cobblestones.4. Embellishments - Tim Holtz - Journalling tickets. K & Company - paper ribbon. Bling on a Budget - Rhinestones/gems.
5. Other items used -Derwents Coloursoft pencils and Sansador (Colouring in stamps) Tim Holtz Distress ink pads (flower centers and card edges). Sakura clear Gellyroll glaze pen (clock face, eyes, buttons, case handle)) Krylon Copper pen (colour banding on suitcases) Atyou glitter pens (wording on front of card, Tilda's hat flowers). Pink glitter card (flower centres)
6. All sentiments/wording - computer generated. To get the wording on the journaling ticket, I first printed the words onto a piece of A6 card then using a small piece of double sided tape I positioned the ticket over the words (I held the paper up to the light to get it right, if you've got a light box that would be even better) then fed it through the printer again.
So there you have it, I really enjoyed making this card, though I didn't like the reason I made it, I shall miss Michelle, but I am very happy that she is finally getting to where she wants to be.
Thank you for looking and take care & keep smiling

Sunday, 21 February 2010

Alota Rubber Stamps Challenge 29 - Distress It


Hello on this cold and snowy Sunday. The card I'm about to show you I originally made for the Alota challenge 27 - punch happy, but I forgot to post it DOH. But all is not lost as I had distressed this card aswell so here it is ...


Card size - standard A5 (14.8cm x 21cm)
1. Designer paper by K & Company
2.Both stamps by Alota Rubber stamps - Shed and Garden shelf. Coloured with Derwents coloursoft pencils and Sansador. The Ivy leaves and bottle were gone over with Sakura clear gellyroll glaze pen and a silver gel pen was used on the tools.
3. The "branch" at the top was made with Leone Em ash branch punch and the tiny flower punch was one I bought from a local supermarket. The center of the flowers were dotted with Smooch Gold Lame.
4. Down the bottom the daisy flowers were bought off eBay and the foliage was made with Martha Stewarts Branch and Frond punches, and garden twine used for the bow.
The plant labels were made with a template I found on the internet, and with a graphics program I added the flowers and text then hand cut and punched.
5. the edged of the DP and the main image were distressed using Tim Holtz's paper distresser and his Antique linen distress ink.
Thank you for droppin by and to Emily - yes I am still alive LOL, though not crafting as much as I should be :o)
Take care and keep smiling

Wednesday, 3 June 2009

Whiff of Joy Challenge 33 - Once Upon A Time In Merry England

Here is my 4th card in my series of Once Upon a Time cards using the Whiff of Joy Medieval collection stamps and also my entry into the Whiff of Joy Challenge 33 ...


Card size A5 - 21cm x 14.8 cm

Base up...

  • Stardream Pearlescent "Chocolate Brown" card
  • DP is from DCWV "Once Upon a Time" 8 x 8 pad
  • Leaf Frame stamp is from Alota Rubber Stamps, coloured with Derwent Coloursoft pencils, Sansador and Sakura Gelly Roll clear glaze pen. I stamped the frame twice, but cut out the leaves on the second stamp to mount on top of the leaves on the frame with 1mm foam pads.
  • The "bush" behind Charlotte I made from the Magnolia Tree with carved heart stamp from the Spring 2008 collection. I only inked up the leafy part of the tree and using a stamp positioner and masking, I stamped the image three times and coloured the with Derwents again.
  • Rogue Charlotte of course is from the Whiff of Joy Medieval collection and coloured the same as above. She was then cut out and mounted with 1mm foam pads.
  • The flower is from Prima Quick pick hydrangea Woodland, and the leaves are made with two different colour green Bazill card and Martha Stewarts' Frond and Branch punches. The frond leaves were scored with a fine embossing tool ant then the ends pinched.
  • The "Once Upon a Time" stamp is from Hampton Art Fairy Tale Stamp set.
  • The tag die cut is made with a Cuttlebug die. The ribbon and charm are from eBay.

I actually started making this card on Sunday and finished it yesterday, then I saw the challenge today and as it fitted the criteria decided to enter it into the challenge.

Thank you for looking and take care & keep smiling

Wednesday, 18 March 2009

Whiff of Joy Meets Magnolia - a birthday card for Nathan

Can you believe it I found a Magnolia stamp I bought last year that I hadn’t put into my “catalogue”, how bad is that. Anyway I’ve found it now and it has been added, AND it’s been used in this next card. I have made this card for my nephew Nathan’s birthday, he’ll be 10.


Card size is A5 = 21cm x 14.8cm or 8.3” x 5.8”

From the base up…
1. Stardream pearlescent card “Mars Red”
2. DP is from Rusty Pickle (what a great name for a company) and is appropriately called “Jester’s Argyle”
3. The wall (Shabby Chic Collection) and window (Easter 2009 Collection) are from Magnolia stamps and the scene through the window is called "Country" and is from Alota stamps.It's a large stamp and I've only used part of it. Coloured with Derwents Coloursoft pencils and Sansodor. The window was stamped first, masked then the wall was stamped over it. The large window pane was cut out then stamped. The scene window has been double heat embossed and the “stained” glass and flag bars have been gone over three times with Sakura Gelly Roll Glaze red, yellow and clear pens. The main image has a gold peel off border.
4. Jester Charlie is from Whiff of Joy coloured the same as above and his bells and juggling balls have been gone over twice with the Sakura clear Glaze pen.
5. Nathan was printed off the computer using “Toyland Outline “ font on to white card, coloured the same as the stamped images and also with Steadtler Triplus fineliner pens and Sakura Gelly Roll Stardust red, blue and green pens and then double heat embossed.
When I first saw the window stamp I thought of castles which made me think of the Charlie the Jester, so I just had to make a card with them both in, and I'm quite pleased with the way it turned out, hope you like it too.
Take care & keep smiling

Friday, 13 February 2009

Heart of Gold – My Time To Craft Challenge & ALOTA4 - Valentines Challenge

Hi di hi folks,
Here’s my entry into the My Time To Craft Challenge and The alota rubber Stamp Valentine challenge over on Paper Craft Planet. I really enjoyed making this card, mainly because I’d had this idea using the alota Ruffled Heart stamp and with this challenge I was able to try my idea out…


1. Base card is Stardream pearlescent
2. DP – K & Co Vintage Collage Flat Paper
3. The heart was made using alota Ruffled Heart stamp – First I stamped the inner heart onto vellum with Encore Metallic Gold ink pad and heat embossed with Stamp-n-Stuff Detail Gold EP. Then cut it out and then stamped it with Rubber Stampede Signature Background stamp using the same inkpad and EP. I found it easier to ink up the stamp, lie it face up on the table then put the cut out heart onto the stamp. This way I could choose which part of the stamp I wanted to use (it’s a large stamp) and because it’s vellum I could see that the image stamped properly. Second I stamped up the inner heart with the lacy border using a white inkpad (ColorBox cats eye ink pad) and heat embossed with Stamp-n-Stuff White Detail EP, again cut it out. Lastly I stamped the whole stamp with the same gold inkpad and EP as before. After cutting this one out it was then glued together. I started with the inner heart, making sure I only put glue where the embossed image was, so as not to have glue showing. Then I glued up the white heart making sure not to glue the lacy bit as I wanted to lift that part a little to make it look like a lace. Then last but not least when I glued the whole heart to stick to the DP, again I didn’t put glue on the ruffle bit.
4. The photo comes from Joanna Sheen’s Fashion Boutique CD ROM, and was printed on Ilford Gallerie smooth pearl photo paper. I cut it out with a small border to make it look like a real photo and then mounted it onto brown Bazzil cardstock with just a 1mm border just to “lift” the photo so as it didn’t get “lost” on the DP. The picture is one of those that have had colour added but through my graphics program I change it first to B&W then added a brown tint.
5. The gold swirl/flourish was made using Sizzlets Decorative Strip die and gold silk Mirri card.
6. The embellishments used where – cream cotton lace, cream lace flowers with yellow jeweled brads in the middle, white mulberry roses, a gold butterfly charm that I bent the wings back slightly and photo corners that where made with a Sizzlits die. The flower part of the die cut can be removed if you want to, but I left it in.
I LOVE the alota heart stamp, it turned out just as I wanted it to (makes a change for me) and I bought an extra one to put in a nice package I’m putting together, which I’ll be giving away on my birthday. OOOoooops didn’t mean to tell you that :P Forget I mentioned it, my birthday isn’t until April and I’m not just going to give it away to a left comment, NO NO NO, you’re going to have to earn it. HE HE HE, (evil laugh), but I’ll let you know more nearer the time. Thanks for taking a peek.
Take care & keep smiling

Sunday, 1 February 2009

Gypsy Tilda

HE HE HE, well this card took me a week to do. The main image took two attempts before I was happy, and Tilda took three attempts. I did consider not putting Tilda on as I REALLY liked how the main image turned out, but decided as I have more Magnolia stamps that I know what to do with I'd better start using them. So take a look at my Gypsy Tilda...


How I made the main image...

1. The caravan is a rubber stamp from alota rubber stamps and the trees is by Inkadinkado.


The caravan stamp didn't really look like a gypsy caravan. Gypsy caravans don't have stoves, so the chimney had to go, and they don't have a back board behind the step, so that had to go as well. I masked both of these off with some low tack masking tape then I inked up the stamp removed the tape and stamped. Because then there were gaps I used my Pilot pigment ink drawing pen to draw in the missing roof and under the step I drew in a box, as that is what you will find there on a real Gypsy caravan. Coloured it in with my Derwents and Sansodor, and went over the red frames and "metal" parts of the caravan with Sakura Gellyroll Glaze pens (red & clear). Then I stamped the caravan again on to a large Post It, cut it out and used it to mask the coloured caravan. Then I stamped the trees twice with Versafine vintage sepia ink using a stamp positioner. As the trees are bare and I wanted the trees to have leaves, I cut a small piece of sponge. This is just an ordinary bath sponge, don't use real sponge, the ink just soaks straight in and you can't sponge onto the paper. I made the sponge as small as possible then using Versafine olympic green ink sponged "leaves" onto the trees, and then randomly scribbled my green derwent onto the the ink to make the foliage look a bit thicker in places. The grass I did with Derwents and Sansodor and to make the tufts and blades of grass I used Staedtler triplus fineliner pens (0.3mm). Just for fun I drew in some daisies with the Pilot pigment pen and used Sakura Gelly roll white pen and yellow pen to colour them in and the birds were drew with the Pilot pen as well.
Tilda is coloured with derwents and Sakura Gellyroll stardust pens (on the apron and the band in her hair). She's sweeping away a cobweb that is a stamp from Magnolia. And the ribbon is from Nostalgia Ribbons. It was VERY expensive, £5 a metre, but I couldn't resist it :) The paper is from Basic Grey "fruit cake".
I must thank my Dad, he helped me choose the DP and the ribbon for this card. In fact before I actually stick any of my cards together, I always show him first to get his opinion, and if there's something he's not happy with I'll change it 'til he says "that's it".
Well, a pretty simple looking card that most of you would probably have thrown together in a couple of hours, but I like it and that's why I don't do as many Tilda cards as I would like to. There are so many accessory stamps, I just feel the need to do a scene with them.
Thank you for stopping by, and when I'm a t work tomorrow I'll see if I can think up a SIMPLE card to make :P
Take care & keep smiling

Wednesday, 5 November 2008

Magnolia vs Stampavie Challenge 1

Hello,
This is my entry for the new Magnolia vs Stampavie Blog Challenge. I like this card, well I like all the snowy bits on it...


Card Ingredients
Background Stamp – alota rubber stamps
Edwin – Magnolia
Sentiment – Third Coast Stamps
DP – Doodlebug
White glitter card
Snowflake Die cuts – Bosscut
Crystal Snowflakes – Dress It Up
Woodware – Fluffy Stuff – (snowflakes)
Sparkle N Sprinkle “Sparkling Snow” glitter – (Edwins’ hat)
Stardream Pearlescent card – base card
Derwent Coloursoft pencils
Sansodor
Foam pads (both stamped images)
Vellum
White ribbon
Thank you for looking.
Take care & keep smiling

Saturday, 1 November 2008

Tilda & Co Challenge 41 - Tulip Tickles

Hello again,
Tilda & Co Challenge are moving house. It's merging with Sarah Kay Challenge to create Magnolia vs Stampavie. The lady who runs these challenges, Donna, runs them both single handedly, so to free up some time for herself she has merged them both together. But for the last Tilda & Co challenge it's still on the old site.
Anyway, this weeks challenge was called "Over the Rainbow", and here's my effort...


I had already made a card with this scene (it's in my slide show) but was not happy with the way it turned out. So with the title of this challenge it seemed like an ideal time to redo it. Still not completely happy, but it's better than the last one.
Tilda and swing stamps are magnolia (of course) coloured with Derwent Coloursoft pencils and Sansodor, and the swing had some string added for the rope. The tulips are from alota rubber stamps, again coloured the same way (these were done twice for layering). The rainbow I made my self from white card a compass and the Derwents again. All are cut out and mounted onto a sky image I "borrowed" from Google, then mounted again onto some Bazzill card stock. The sky image was cut out using Megabilities. The DP used is by Crafty Bitz, and the ribbon is from Raspberry Ribbons July kit. The base card is Stardream Pearlescent card.
Just about finished before the dead line, so I'm off now to post it on there.
So until the next time, take care & keep smiling