Showing posts with label Creative Imaginations. Show all posts

Wednesday, 15 April 2015

Steampunk Card

Bought lots and lots of crafty supplies from a craft fair back in March, one of them being this lovely stamp and though I'd give it the Steampunk treatment :)

Stamp - House of Zandra - "Safari Girl"
Backing Paper  - Creative Imaginations, Marah Johnson - "True"
Dies - Memory Box  - Steampunk Corner
           Cheery Lynn Designs  - Chicken wire
Flowers  - Mirri Satin card
                 EK Success Reto Flower punch
                 Nellie Snellen Floral punch - Stamen 1
                 Cuttlebug embossing folder - Diamond Plate
Sentiment - computer generated and gone over with Atyou Spica glitter pens

Take Care & Keep Smiling :)

Sunday, 6 June 2010

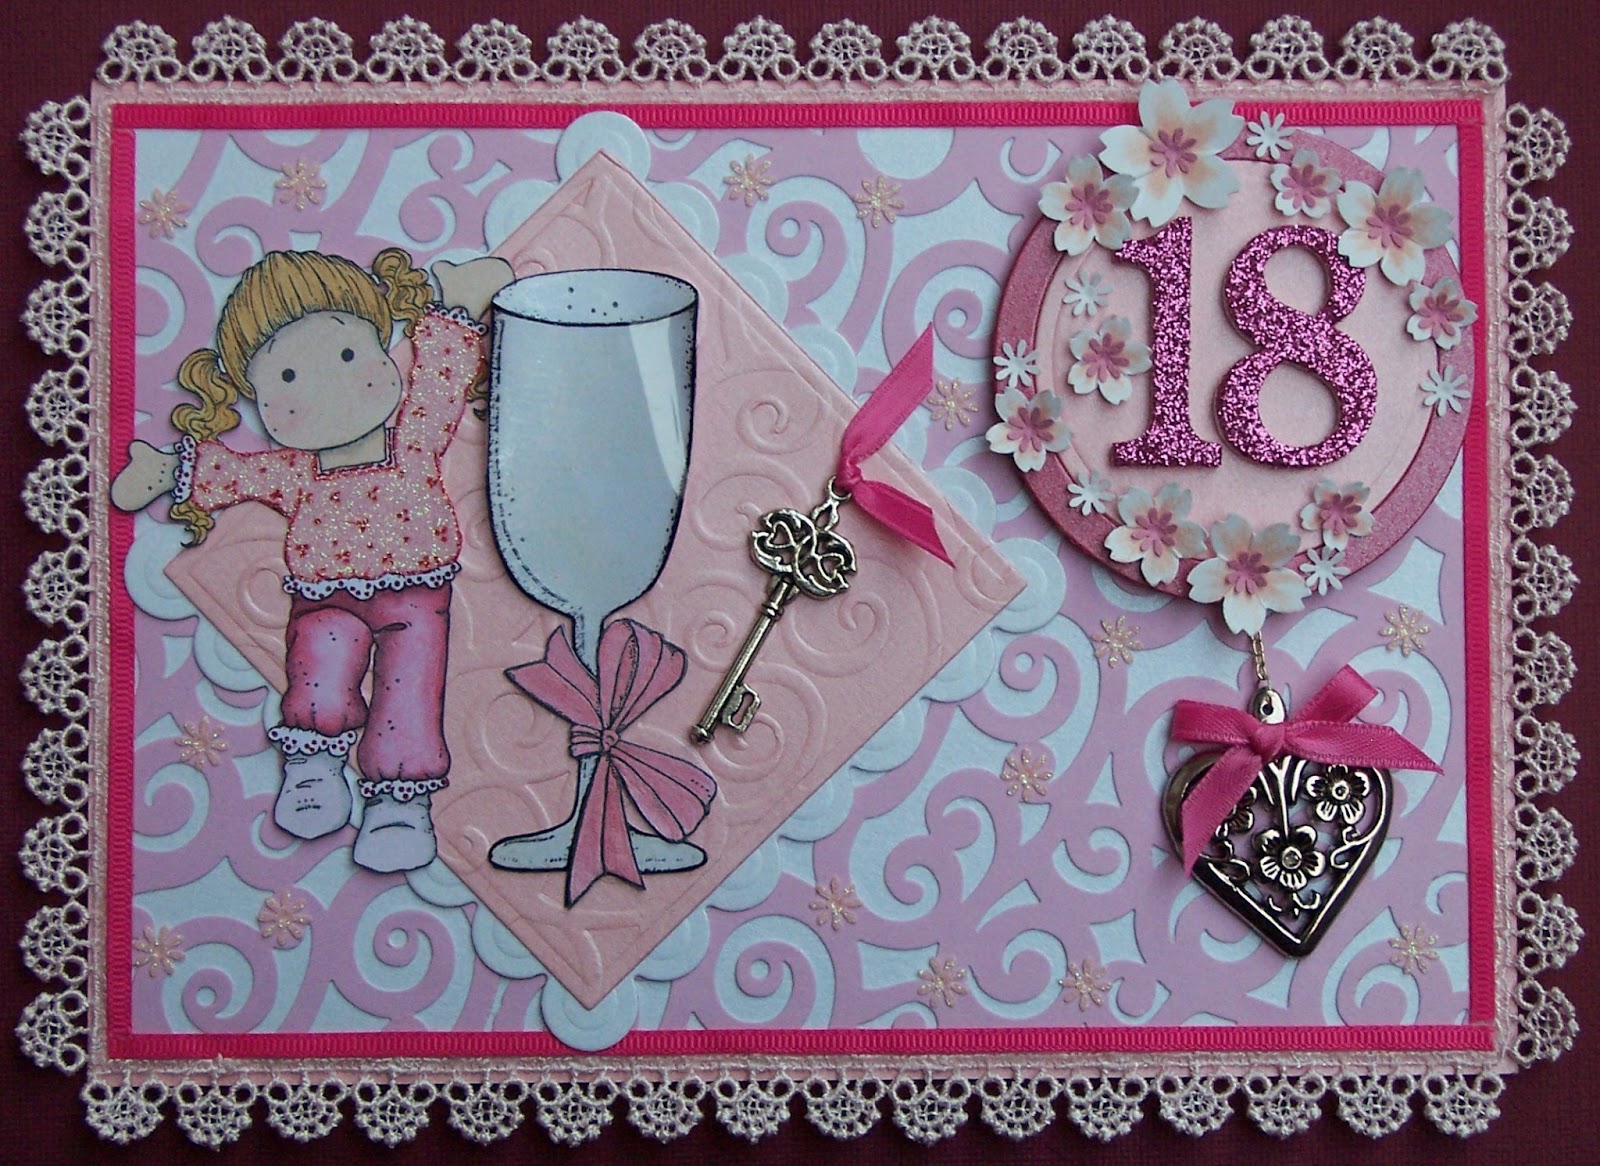
Happy Tilda 18th birthday card, gift set


Tilda strikes again :o) This time for an 18th birthday. I was asked to make this card for a girl who is girly but loves football AND she absolutley adores the husband of Belinda (lady who requested the card). The snag to this is the birthday girl and the husband both support different teams, who happen to be bitter rivals in the world of football. So how to combine all those facts into a card... well here's what I did (lots of photo's, click on them to see more detail) ...

Bazzill card stock - Flowers, covering picture frame and picture mount.
Stardream pearlescent card - base card, square, star and circle Nestabilities,.
Creative Imaginations Samantha Walker Die Cut swirl card
Glitter paper - flowers, Tilda's top.
Shimmerz paint - "Angel Wings" on champagne flute, "Poinsettia Pink" on footballs.
Smooch paint - champagne flute ribbon.
Atyou glitter pens - Football badges and sentiment.
Tim Holtz - flowers
Rubber Stamps - Happy Tilda and Champagne flute by Magnolia Rubber Stamps - coloured with Derwents Coloursoft pencils and Sansodor.
Printable acetate.
Bling on a budget rhinestones.
K&Co paper lace - inside card.
Numbers 1 and 8 - bought from Hallmark Cards.
Pink cotton lace and ribbons.
Metal key and heart bought from eBay.
Cherry Blossom multi punch by Woodware.
I'm not going to go into great detail as to how the card was made, but the insert backing paper was made by me using a football image sourced from the web and then changed to pink. I then painted over the pink parts with Shimmerz paint. The football badges were sourced from the web changed the colours to various pinks and then coloured over with Atyou glitter pens.
Tilda's top was my first try at paper piecing, I used Stazon Rocket red ink on pink glitter paper and then went over it with a Staedtler fine red pen.
Thank you for looking and take care and keep smiling

Sunday, 23 November 2008

Poinsettia Gift

Hello and welcome to a cold but bright Sunday, it did try to snow last night but we've had some rain so it's all gone now. Any hoo here's the next installment of the Dad Christmas cards...
Oh and two photo's again 'cos I couldn't decide whether I liked it with the flash or not!...


This was a nice easy card to make especially as I "borrowed" an idea from a card I saw on Paper Craft Planet. All I used was (starting from the base card) Mars red Stardream Pearlescent card, gold Satin Mirri card, Creative Imaginations DP, Poinsettia flower I made up from Blooms To Go Christmas kit, Rhinestones, green ribbon and a sentiment rubber stamp (unknown brand) cut out with Petite oval Nestabilities. I like this design so much I'm going to use it again on another card, this time with snowflakes. So until then,
Take care & keep smiling

Monday, 17 November 2008

Jolly Santa

Hello again,
what a miserable day (well it was here), rain, rain ,rain, rain and a bit more rain. I feel like a duck. Well yesterday saw me starting on my Dads cards (the ones he'll be sending out). He doesn't do cute, so no Tildas or house mouses....


Well the Santa image is from Joanna Sheens Victorian Christmas CD ROM ans I was going to mount it on a Nestabilities die cut oval but decided to use the waste bit instead. I layered the DP die cut waste onto some gold Silk Mirri card (sorry before doing that I put the ribbon round the DP) and then put the image into the oval. I cut the Mirri card a mm wider than the DP so as there would be a border running down the sides. That was then layered onto some more DP and then some gold snowflake border peel offs down the sides. The sentiment is from Crafty Secrets vintage die cuts "Christmas Time". You can't see it but I did triple emboss it, not with the ultra thick stuff, just normal clear embossing powder. I never seem to get a nice smooth finish with the thick stuff, I mainly use that if I'm going to stamp into it. Anyway that's the finished card, I'm now going to attempt a silhouette Christmas card. I saw a scrapbook page on Emilies blog that was just black and white, and it reminded me of a monochrome card I'd done a while back and how difficult it was, well not difficult but black and white can be a bit boring if you don't do it right.
So take care, keep smiling and stay dry and if you can't stay dry, waddle :)


DP's used - Creative Imaginations and Prima

Friday, 10 October 2008

House Mouse Challenge 8 - Halloween

This is my entry for the House Mouse Monday Challenge No.8 which is to make a card for Halloween...
I'm very pleased with the way the card turned out. I used Derwent's Coloursoft pencils and Sansodor.And the close up of the spider as he looks just looks like a blob on the card photo. The papers used are by Creative Imaginations except the stripy one, that was made by me on the computer. The sentiment is from House Mouse, stamped on pearlescent orange card and heat embossed with Sparkle N Sprinkle patina gold EP, then cut round. The main stamp is called Frightingly Adorable, which was mounted onto black card and sponged with Brilliance orange inkpad. Then last but not least two black jewelled brads and a spider button from Dress It UP. The sketch I used unfortunatley I can't remember where I got it from, if you do, let me know and I'll add a link on this page (give credit where it's due). Thank you for looking.


Take care & keep smiling