My son's girlfriend Phoebe is a bit of a Moomin fan, so I had to make a Moomin card. I always try to make a box for the cards I make but on this occasion I altered a Cadbury's chocolate biscuit tin and lined it, so now she can use it as a sewing box, trinket box etc. or she can just keep the card in it :) ...
The Moomin or should I say Snork maiden I sourced from the internet, printed - traced - transferred and then went over with a waterproof ink pen and then coloured. Her arm was done separately and glued on after I added the small tulips and handbag. The tulips both large and small are from Magnolia's Easter Collection, the small ones are taken from The Tilda with Tulips stamp. The handbag I made myself adding the Vivienne Westwood logo, as Phoebe has one of her handbags. The boutique window, topiary pots and canopy are all Magnolia stamps. The cobblestones is by Water colour cobblestones.
The backing paper is from the Basic Grey Euphoria collection with Inkadinkado Gem stones flourishes clear stamps. Some of the "gems" were coloured in with felt tips pens and then gone over with a clear glaze gel pen.
The die cut is a Spellbinder die but I can't remember which one which I pierced.
Take care & keep smiling :)
Showing posts with label Smooch. Show all posts
Saturday, 25 October 2014
Saturday, 19 May 2012
A Fairy Tale Wedding
Here's a wedding card I made last month but couldn't post until the big day was over.
I used a combination of Whiff of Joy, Magnolia and Paper Artsy rubber stamps to create the images, and the papers are from DCWV Once Upon A Time Matt Stack. The size of the card is 6.5 inches by 6.5 inches. Way too many details to go into but if you want to know anything just drop me a line.
Thank you for looking and take care & keep smiling :o)
I used a combination of Whiff of Joy, Magnolia and Paper Artsy rubber stamps to create the images, and the papers are from DCWV Once Upon A Time Matt Stack. The size of the card is 6.5 inches by 6.5 inches. Way too many details to go into but if you want to know anything just drop me a line.
Thank you for looking and take care & keep smiling :o)
Tuesday, 21 September 2010
Tri Shutter Card - Dads Birthday

Here is my first attempt at a Tri Shutter Card. What a nightmare, cutting out all those panels and then trying to figure out where to put the embellishments so as the card would shut. But I did it and I'm very happy with the result.


The designer paper is by K & Company.
Flourish stamp - Tim Holtz
Butterfly - Marianne Design Creatables Butterflies 3. This was Cut from a lilac Bazzil card and then sponged with Tim Holtz Weathered Wood and Broken China Distress inks and then double heat embossed.
The flowers where made by me using EK Success Daisy punches. Again sponged with Tim Holtz Broken China Distress ink. The stamens I bought. The leaves are made using Nellie's Choice Jumbo leaf punch and embosser.
Metal frame and feather I found in my stash of goodies :o) The postage stamps are from Graphic 45 and the cameo is a Dress it Up button. I cut off the shank removed the cameo ant then sanded and painted the frame (which was black) with Smooch Azure ink. I left this for a couple of hours then wiped off the excess.
Very Best Wishes stamp is by Butterfly Kisses. Stamped with Toffee Versafine. Then the words were painted with Smooch Azure and Molasses. The Azure words were then gone over 3 or 4 times with Sakura Clear glaze gel pen.
Small butterflies are Martha Kay's' Medium Monarch Butterfly punch.
The poem is by Walter De la Mare and is called "The Sleeper", it's actually about Ann watching her mother sleep, but I changed it to father. You might be thinking what has that poem got to do with birthdays. Nothing, it's just that my Dad has a habit of falling asleep in the chair and it seemed appropriate, especially as the "watcher" is named Ann.
The dots around the box sides were made usin my Scor-Pal and Scor-Bug Embosser.
I'll show you how I made the flowers another time, but until then ...
thank you for looking and take care and keep smiling :o)
Sunday, 6 June 2010
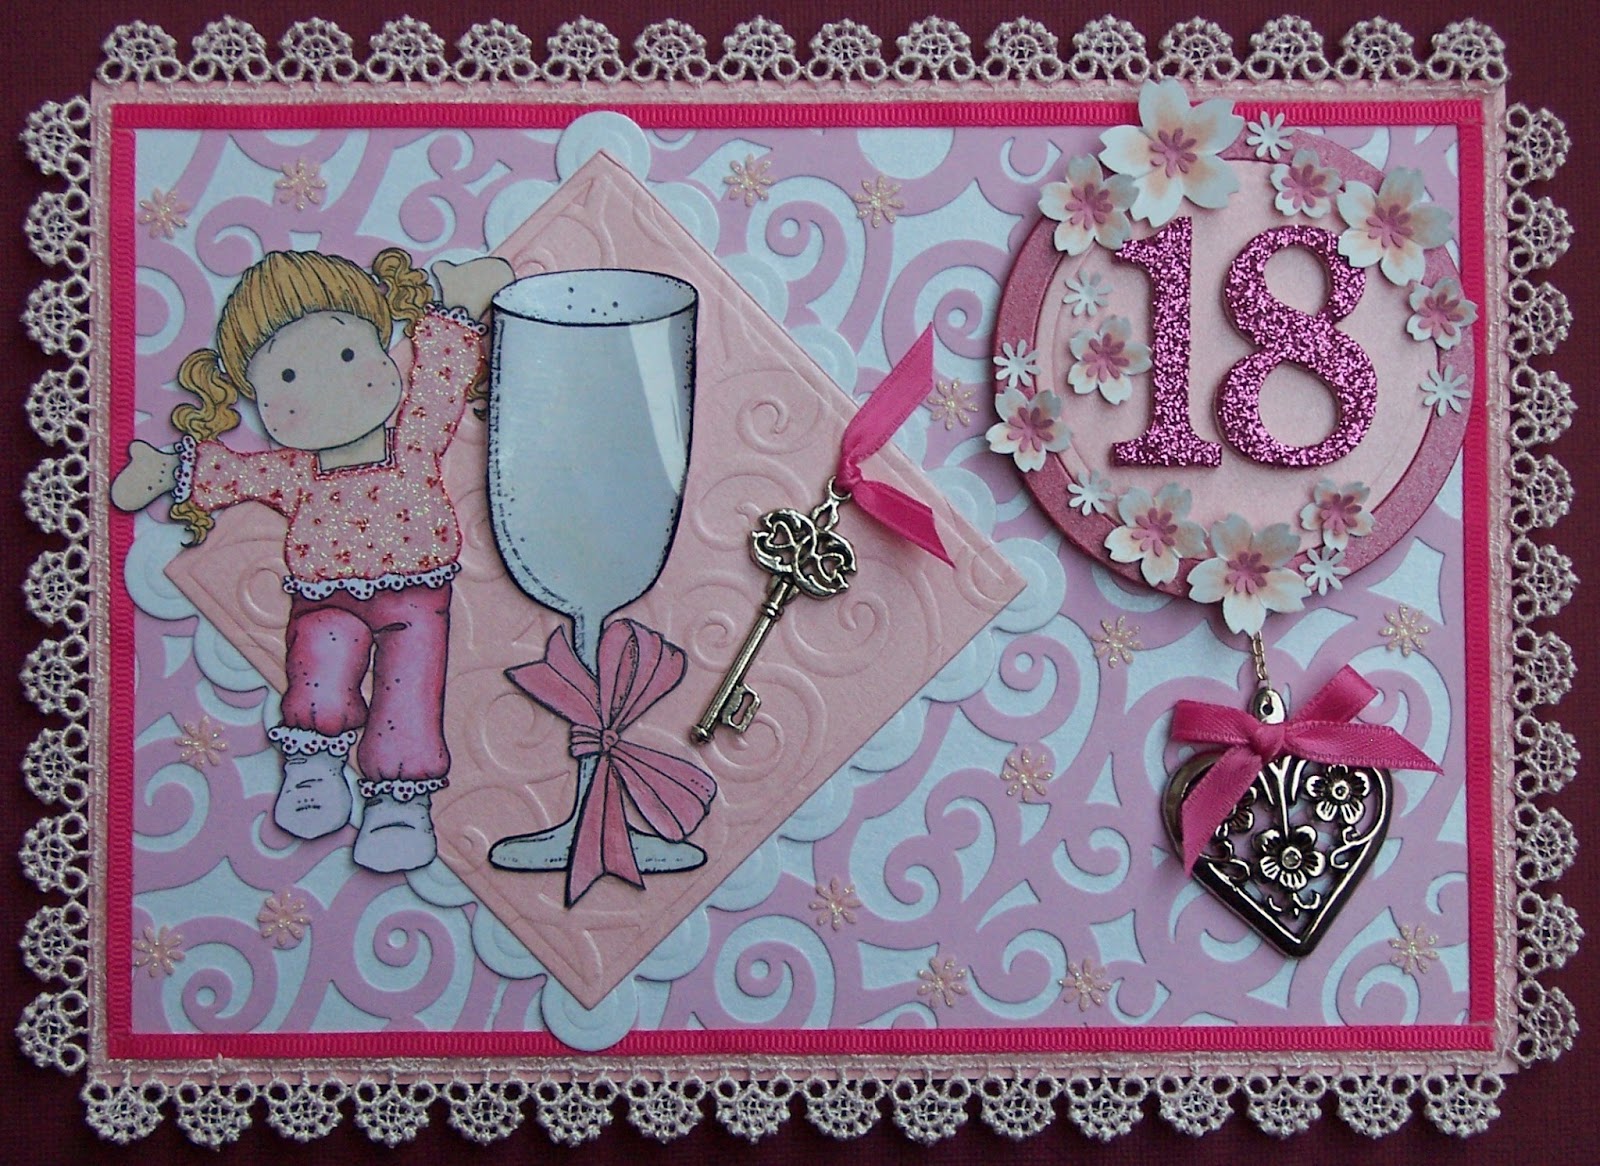
Happy Tilda 18th birthday card, gift set

Tilda strikes again :o) This time for an 18th birthday. I was asked to make this card for a girl who is girly but loves football AND she absolutley adores the husband of Belinda (lady who requested the card). The snag to this is the birthday girl and the husband both support different teams, who happen to be bitter rivals in the world of football. So how to combine all those facts into a card... well here's what I did (lots of photo's, click on them to see more detail) ...
Creative Imaginations Samantha Walker Die Cut swirl card
Glitter paper - flowers, Tilda's top.
Shimmerz paint - "Angel Wings" on champagne flute, "Poinsettia Pink" on footballs.
Smooch paint - champagne flute ribbon.
Atyou glitter pens - Football badges and sentiment.
Tim Holtz - flowers
Rubber Stamps - Happy Tilda and Champagne flute by Magnolia Rubber Stamps - coloured with Derwents Coloursoft pencils and Sansodor.
Printable acetate.
Bling on a budget rhinestones.
K&Co paper lace - inside card.
Numbers 1 and 8 - bought from Hallmark Cards.
Pink cotton lace and ribbons.
Metal key and heart bought from eBay.
Cherry Blossom multi punch by Woodware.
I'm not going to go into great detail as to how the card was made, but the insert backing paper was made by me using a football image sourced from the web and then changed to pink. I then painted over the pink parts with Shimmerz paint. The football badges were sourced from the web changed the colours to various pinks and then coloured over with Atyou glitter pens.
Tilda's top was my first try at paper piecing, I used Stazon Rocket red ink on pink glitter paper and then went over it with a Staedtler fine red pen.
Thank you for looking and take care and keep smiling
Bazzill card stock - Flowers, covering picture frame and picture mount.
Stardream pearlescent card - base card, square, star and circle Nestabilities,.Creative Imaginations Samantha Walker Die Cut swirl card
Glitter paper - flowers, Tilda's top.
Shimmerz paint - "Angel Wings" on champagne flute, "Poinsettia Pink" on footballs.
Smooch paint - champagne flute ribbon.
Atyou glitter pens - Football badges and sentiment.
Tim Holtz - flowers
Rubber Stamps - Happy Tilda and Champagne flute by Magnolia Rubber Stamps - coloured with Derwents Coloursoft pencils and Sansodor.
Printable acetate.
Bling on a budget rhinestones.
K&Co paper lace - inside card.
Numbers 1 and 8 - bought from Hallmark Cards.
Pink cotton lace and ribbons.
Metal key and heart bought from eBay.
Cherry Blossom multi punch by Woodware.
I'm not going to go into great detail as to how the card was made, but the insert backing paper was made by me using a football image sourced from the web and then changed to pink. I then painted over the pink parts with Shimmerz paint. The football badges were sourced from the web changed the colours to various pinks and then coloured over with Atyou glitter pens.
Tilda's top was my first try at paper piecing, I used Stazon Rocket red ink on pink glitter paper and then went over it with a Staedtler fine red pen.
Thank you for looking and take care and keep smiling
Tuesday, 7 July 2009
Just Magnolia Challenge 12 - Tilda Gift Set Card
I didn't think I was going to get this card finished today, but I did and I'm very pleased with the result. This card is to go with the Pack a Picnic gift box and Tea bag gift box I made for my friend Michelle's birthday and is also my entry for the Just Magnolia week 12 Challenge - So Charming...
Card size - A5 - 21cm x 14.8cm
1. Stardream pearlescent pink card (base)
2. Heart swirl DP from Bearly Mine Designs Designer Extreme Vol. 1 CD Rom. The hearts were painted with Shimmerz Blingz Poinsettia Pink.
3. The ovals were cut with Nestabilities and the embossing was done with Impressabilities Flowers. To get the nice smooth edge (no embossing) on the dark pink card, I first cut the oval but left it in the oval die, then using this stack - A plate, B plate, Tan mat, card with nestabilitie (Nestie on top), Impressabilites plate, B Plate and then two pieces of card and then run it through my Cuttlebug twice. Found that little tip on the Wizard website, though it wasn't for the Cuttlebug, but I though I'd give it a go to see if it worked.
4. Tools used for the flowers can be found on my Pack a Picnic post. The leaves however on this card were made with L-Em Ash branch punch. I had to stand on this punch to get it to work !!!
5. The Magnolia Tilda stamp is coloured with Derwent Coloursoft pencils and Sansodor, and her shoes were painted with Smooch Siren. When I stamped Tilda I used Versafine Onyx black Cube so as to miss the little cross stitch heart on her apron, then after cleaning the stamp I inked just the heart with Versafine Crimson red and using a stamp postioner then stamped the heart onto the apron.
6. The charms and chain I got off eBay except the little handbag which was in the parcel that Lotti sent me (photo's of which will follow soon).
If I've missed anything it's because those details are on the Pack a Picnic post, so here's a photo of the whole Tilda gift set, just got to add chocolates and little prezzies :o) ...
Take care & keep smiling
Subscribe to:
Posts (Atom)